Summary
Master the Art of Painting Doors and Trims with These 6 Expert Tips – Unlock Your Home’s Potential is a comprehensive guide aimed at helping homeowners and DIY enthusiasts achieve professional-quality results when painting interior and exterior doors and trim. Painting these architectural elements can dramatically enhance a home’s aesthetic appeal, highlight design details, and protect wood surfaces from wear and damage. This article provides essential advice on preparation, paint selection, color palettes, painting techniques, maintenance, and common pitfalls to avoid, empowering readers to transform their spaces with confidence and skill.
Proper surface preparation, including cleaning, sanding, and priming, is emphasized as the foundation for a smooth, durable finish. The guide discusses the merits of different paint types—such as alkyd (oil-based) and acrylic latex paints—and recommends finishes like semi-gloss or high gloss for their durability and ease of cleaning. It also highlights the importance of selecting appropriate tools, such as angled brushes and foam rollers, and applying paint with techniques that minimize brush marks and ensure even coverage.
Color palettes tailored to various interior styles are explored, from classic warm whites to bold darks and rich traditional hues, offering inspiration for matching or contrasting trim and door colors to suit personal taste and architectural context. The article also addresses common mistakes, such as inadequate preparation or improper tool use, and offers maintenance tips to keep painted surfaces looking fresh over time.
Notably, the article acknowledges debates around the best paint types and finishes for doors and trims, balancing factors like durability, drying time, environmental impact, and ease of application. It also contrasts traditional brush-and-roller methods with advanced options like paint sprayers, weighing their pros and cons in terms of cost and skill requirements. By following the six expert tips and avoiding common errors, homeowners can unlock their home’s potential through beautifully painted doors and trims that add character, charm, and lasting value.
Preparation
Proper preparation is essential for achieving a smooth, professional finish when painting doors and trim. Whether you are working on baseboards, door frames, kitchen cabinets, or other trim, taking the time to prep correctly helps prevent brush marks, roller stipple, and other imperfections from showing through the paint.
Begin by thoroughly cleaning all surfaces with a degreasing agent such as sugar soap to remove dirt, grime, and any buildup that could interfere with paint adhesion. After cleaning, inspect the woodwork closely for any rough areas, peeling paint, or holes. Small holes can be filled with spackling and sanded smooth once dry. For rough or worn wood, start sanding with a coarse grit like 80-grit and progressively move to finer grits (100- to 220-grit) to achieve a smooth surface. If wood filler or spackling has been applied, sand lightly with 120-grit sandpaper until level with the surrounding wood.
Next, protect adjacent surfaces by taping off edges with painter’s tape and covering floors or furniture with plastic sheeting and drop cloths. Press the tape down firmly to prevent paint seepage and ensure clean lines. When working on doors that cannot be removed, prop them open fully to expose as much of the frame as possible and cover hardware to avoid accidental splatters.
If painting previously colored doors or trim, assess the existing paint condition carefully. Areas with peeling or chipped paint should be sanded or scraped before repainting. For colored doors, priming with a foam roller and two coats of primer is recommended, lightly sanding between coats with fine-grit sandpaper to ensure proper adhesion and a smooth finish.
By following these preparation steps—cleaning, filling, sanding, protecting, and priming—you set the stage for a flawless paint job that enhances your home’s appearance and durability.
Paint Selection
Choosing the right paint for interior doors and trim is crucial, as the composition and finish of the paint determine its consistency, adhesive properties, durability, drying time, and ease of maintenance. Two primary types of paint are optimized for these surfaces: alkyd (oil-based) paints and acrylic latex/enamel paints. Both options offer distinct advantages depending on the desired finish and application preferences.
Paint finishes play a significant role not only in the appearance but also in the longevity and cleanability of doors and trim. Glossier finishes, such as semi-gloss and high gloss, are tougher and easier to clean than flatter paints, making them ideal for areas that experience frequent contact and wear. While higher-sheen paints tend to be more expensive and can highlight surface imperfections, they provide enhanced protection and a reflective surface that helps maintain the trim’s aesthetic appeal over time.
Among popular and reliable paint brands, Benjamin Moore and Sherwin-Williams stand out for their high-quality products specifically formulated for doors and trim. Benjamin Moore’s Advance and Aura lines offer excellent coverage and durable finishes that withstand regular cleaning. Sherwin-Williams provides durable options like ProClassic and Emerald Urethane Trim Enamel, favored by professionals for their smooth application and lasting finish.
Color choice for interior trim is generally best kept neutral to complement surrounding walls and decor, though personal preference ultimately guides the decision. When selecting paint tools, investing in high-quality brushes and rollers suited to the paint type is essential for a smooth, even application without drips or buildup. For exterior doors and trim, latex-based exterior paints designed specifically for outdoor use should be employed to ensure weather resistance and longevity.
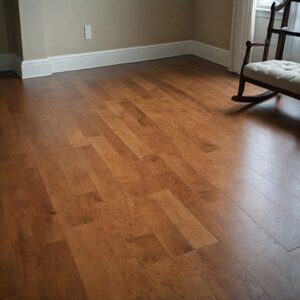
Color Palettes for Different Interior Styles
Choosing the right color palette for doors and trims plays a crucial role in defining and enhancing various interior styles. A well-selected palette not only complements the overall decor but also adds depth and character to the space.
For a classic and timeless look, warm whites such as Benjamin Moore’s Cloud White and Simply White in semi-gloss or satin finishes are highly favored for trimwork and doors. These shades create a clean, elegant backdrop that pairs well with almost any wall color, providing a neutral base that helps other elements in the room stand out. Similarly, Dulux offers a range of whites like Natural White™, Casper White Quarter, and Vivid White™ trims that work beautifully in styles such as the Australian “Hamptons” twist, where simplicity and balance are key.
For those seeking a bolder statement, darker hues can be used effectively on doors and trims to create striking contrast, especially against lighter walls. Deep blacks, grays, and charcoal shades such as Dulux’s Oolong—a charcoal with a subtle blush undertone—can add sophistication and drama to a room while maintaining flexibility in wall color choices. Slightly darker neutrals are often preferred over pure black for a whole-home approach, as they allow for a balanced palette and greater versatility.
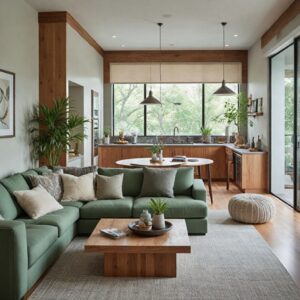
In traditional and rustic interiors, richer and deeper colors—like blues, burgundy reds, burnished oranges, deep greens, olive, and ginger—bring warmth and character. Pairing these with skirting and trim in softer shades such as Dulux’s Beige Mystery or Parchment Paper enhances the depth of the scheme without overwhelming the space. The rustic style thrives on layering these rich colors with natural textures and antiqued objects, creating an inviting and grounded atmosphere.
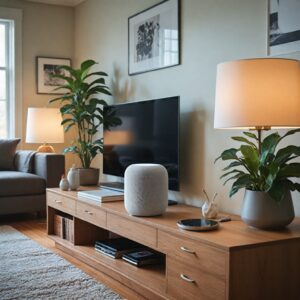
For modern and Scandinavian-inspired designs, palettes tend toward subtle and dark greys mixed with brighter block colors, combined with cooler whites like Dulux’s White on White™. These choices emphasize clean lines and understated elegance, with the option to layer natural textiles and timbers to add warmth and texture.
Finally, a subtle approach to color can highlight architectural details. Using slightly different but harmonious shades—for example, painting columns in pale gray against a creamy white facade—adds visual interest without disrupting the overall color harmony. This technique works well across many interior styles to draw attention to unique features and elevate the space.
Ultimately, whether opting for timeless whites, bold darks, or rich traditional hues, the choice of color palettes for doors and trims should reflect personal taste while enhancing the architectural and stylistic intent of the home.
Painting Techniques
Achieving a smooth and professional finish when painting doors and trims requires careful preparation, the right tools, and effective application methods. The process involves multiple steps that blend both art and science to enhance the appearance of your home’s architectural details.
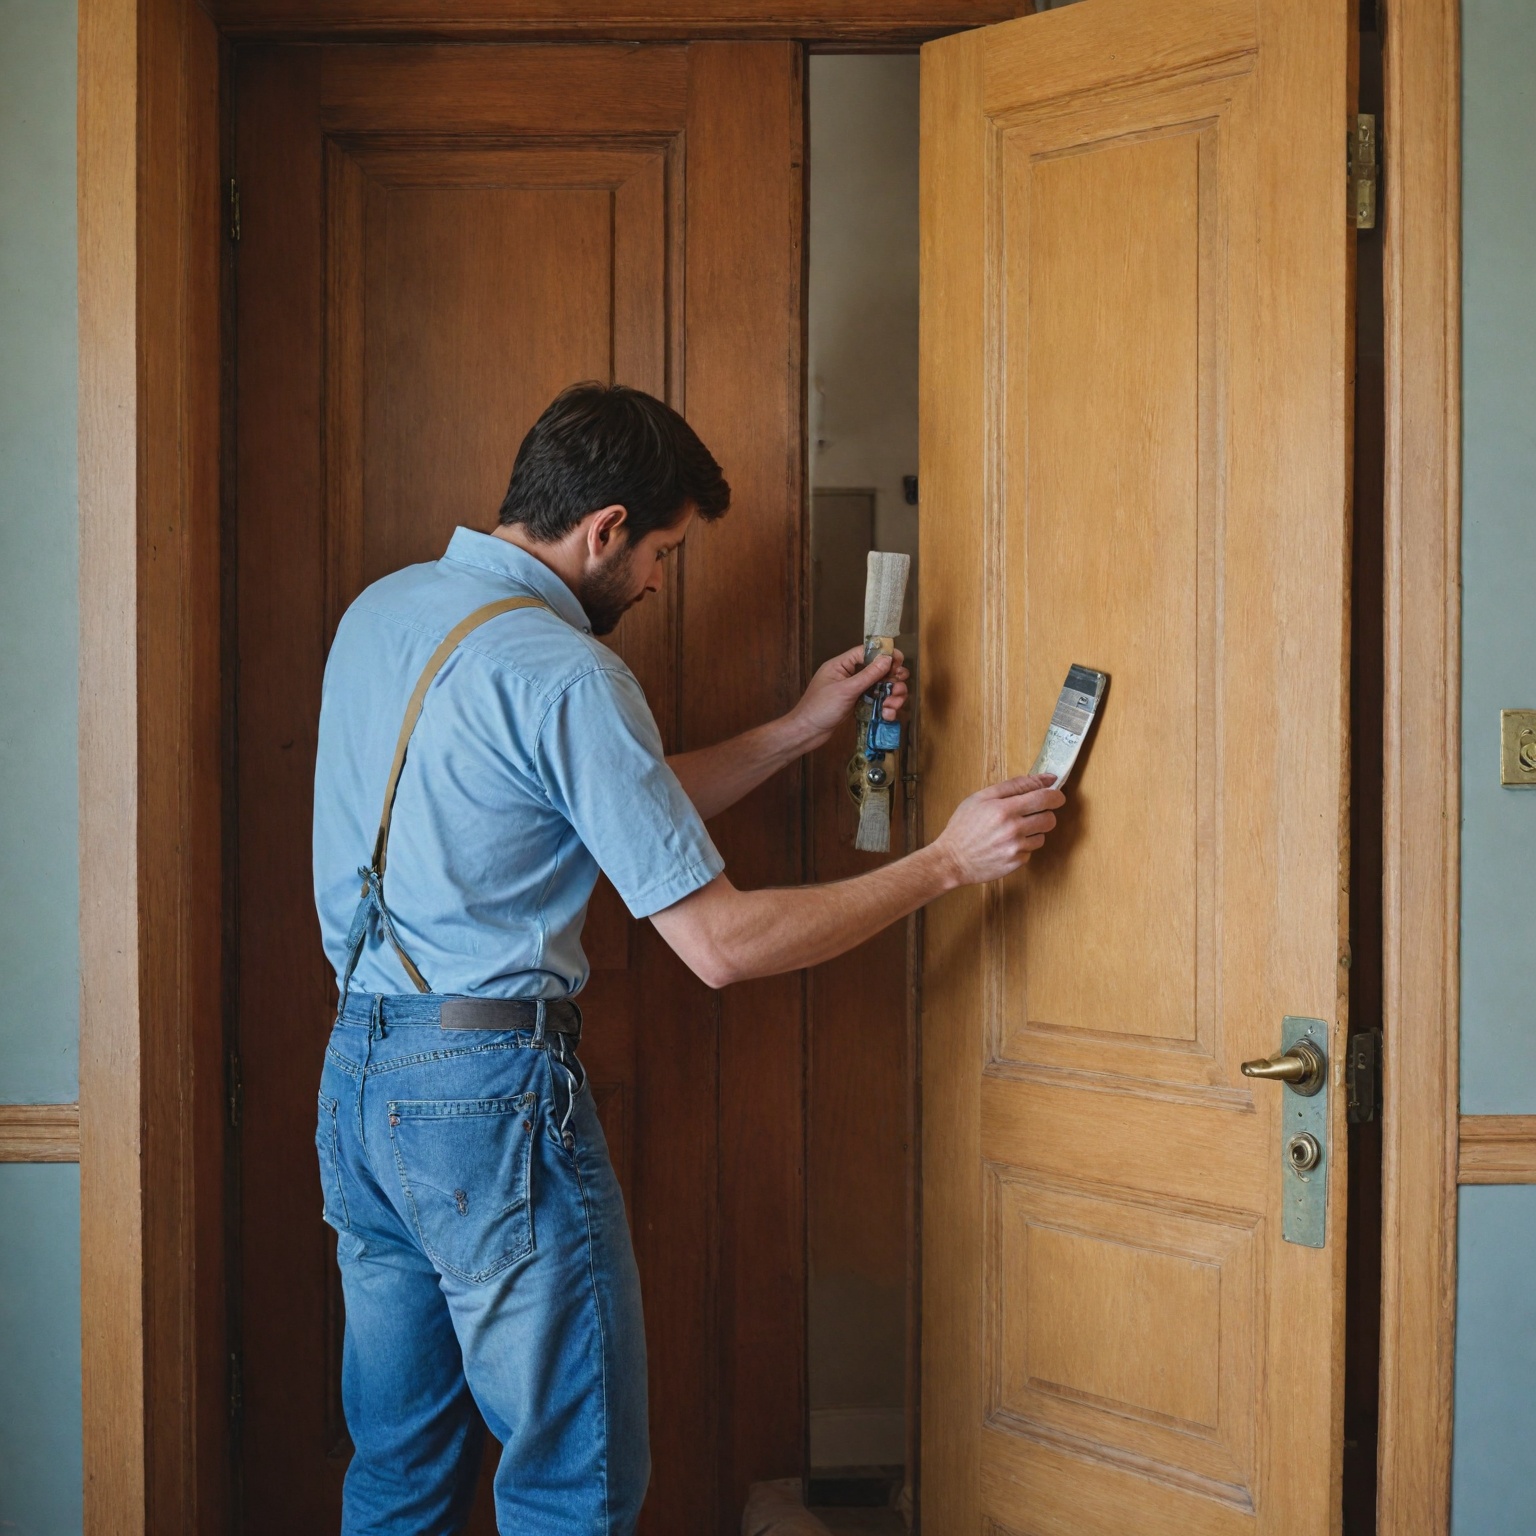
Surface Preparation and Priming
Proper preparation is crucial before painting. This includes cleaning the surfaces, removing hardware such as handles and locks, and sanding to ensure paint adhesion. For doors that are painted colors other than white, applying two coats of primer with a foam roller followed by light sanding between coats is recommended to create a smooth base. Using a quality primer helps prevent peeling and improves durability. Some painters prefer latex primers for ease of use, while others choose oil-based primers depending on the existing finish and paint compatibility. Once the primer is dry, lightly sanding the trim with 120-grit sandpaper and removing dust ensures a flawless finish.
Choosing the Right Tools
Selecting appropriate painting tools significantly impacts the final look. A 2 ½-inch angled brush is ideal for cutting in and painting trim edges, providing precision and control. Specialty trim brushes, such as smaller brushes for tight spaces, help achieve clean lines where standard brushes won’t fit. For larger flat surfaces like doors, using a high-quality foam roller can eliminate brush marks and roller stipple, producing an even, smooth coat. Pre-wetting the roller with water (for latex paints) or mineral spirits (for oil-based paints) before loading paint improves paint pickup and application smoothness.
Application Techniques
Painting doors and trims typically involves combining brush and roller methods. Most of the surface can be covered with a roller, reserving the brush for detailed or hard-to-reach areas. Begin painting systematically from one end to the other to maintain a wet edge and avoid lap marks. Applying multiple thin coats with proper drying time in between—usually several hours to up to 16 hours depending on paint type—helps achieve a durable finish without runs or drips. When imperfections occur, waiting until the paint dries before sanding and touching up prevents damage to the surface. Removing painter’s tape carefully, either by pulling it off immediately after repainting along the edge or scoring with a utility knife, prevents peeling and sharpens the paint lines.
Advanced Tips
For the highest quality finish, some professionals use paint sprayers, which produce the smoothest and most even coverage without brush marks. However, spraying requires more expensive equipment, skill, and preparation, and is often more time-consuming and costly. Alternatively, selecting paint formulas specifically designed for trim—such as oil resin suspended in water paints—can improve leveling and hide brush and roller marks. Patience, attention to detail, and using the right combination of tools and materials elevate the painting project, making trims and doors standout features in any room.
By mastering these techniques, homeowners can unlock their home’s potential through beautifully painted doors and trims that add character and charm to interior spaces.
Six Expert Tips for Professional Results
Achieving a professional finish when painting doors and trims requires careful preparation, the right materials, and precise techniques. Here are six expert tips to help unlock your home’s potential and ensure smooth, durable, and visually appealing results.
1. Thorough Surface Preparation
Proper preparation is the foundation of a flawless paint job. Begin by clearing the room of furniture and protecting all surfaces to avoid accidental splatters. Inspect the wood surfaces for roughness, dents, or imperfections. Use coarse sandpaper (around 80-grit) for rough or worn areas, followed by finer grits (100- to 220-grit) to achieve a smooth finish. If you have used wood filler, lightly sand it with 120-grit sandpaper until it is flush with the surrounding surface. Cleaning dust thoroughly ensures painter’s tape adheres well and helps prevent paint bleed.
2. Choose the Right Paint Type
Selecting the appropriate paint is crucial. Two types are commonly recommended for interior doors and trim: alkyd (oil-based) paints and acrylic latex/enamel paints. Each type differs in consistency, drying time, durability, and cleanability, so choose according to your needs and preferences. For exterior doors and trims, latex-based exterior paint formulated for trim work offers durability against weather conditions.
3. Utilize Painter’s Tape Effectively
Apply painter’s tape to areas adjacent to trims and doors, such as walls and floors, to create clean lines and protect surfaces from splatters. Press the tape firmly to prevent paint seepage. When removing the tape, wait until the paint is dry or score along the tape edge with a utility knife before pulling it up to avoid peeling the finish.
4. Master Your Painting Technique
Use a combination of brushes and rollers to achieve an even, streak-free finish. An angled tip brush works well for tight corners and detailed areas, while a high-quality roller efficiently covers larger flat surfaces. Employ the “roll and back tip” technique: apply paint in long, even strokes and immediately roll back over the area to smooth out brush marks and roller lines. Avoid painting over imperfections; instead, wait for the paint to dry before lightly sanding and touching up any flaws.
5. Manage Drying and Recoating Properly
Allow ample drying time between coats to prevent issues such as bubbling or uneven texture. When possible, let painted doors dry overnight before applying a second coat or reattaching hardware. For exterior doors, consider professional drying techniques that speed up the process without compromising the finish. Applying multiple thin coats rather than a single thick one promotes durability and a better overall appearance.
6. Maintain Cleanliness and Safety
Keep your workspace clean and ventilated throughout the painting process to reduce dust and fumes. Use paints that balance durability with low fumes, such as waterborne oil-resin paints recommended for trim and cabinetry. Regularly clean brushes and tools according to paint type instructions to prolong their usability and ensure optimal results in future projects.
By following these expert tips—focusing on preparation, paint selection, technique, and drying—you can achieve a professional-quality paint job that enhances your home’s aesthetic and longevity.
Common Mistakes to Avoid
When painting doors and trims, avoiding common errors can greatly improve the final appearance and durability of your project. One of the most frequent mistakes is rushing into painting without proper preparation. Failing to clean the surfaces thoroughly, remove old paint, or repair damages such as dents and scratches can result in an uneven and subpar finish. Proper surface preparation often includes sanding with fine-grit sandpaper (e.g., 220-grit) to smooth out imperfections and then cleaning the area with a damp microfiber cloth to remove dust and debris.
Another prevalent error is using low-quality brushes or rollers that are not suited for the type of paint being applied. Investing in a high-quality brush designed for your specific paint can help achieve a smooth and even coat, reducing the risk of drips, brush marks, and runs. Additionally, applying too much paint on the brush or roller can cause excess buildup and uneven texture, so it is important to use moderate, consistent strokes.
Many DIY painters assume that a single coat of paint will suffice; however, applying two or more coats is often necessary to ensure full coverage and a professional look. When priming doors—especially those painted colors other than white—using a foam roller and applying two coats of primer with light sanding between coats (such as with p320 grit sandpaper) is recommended to enhance adhesion and smoothness.
Other mistakes include neglecting to remove door hardware before painting. Keeping handles on the door increases the likelihood of visible brush strokes and makes painting around them difficult. Furthermore, choosing the wrong paint type can affect the drying and
Maintenance and Touch-Ups
Proper maintenance and timely touch-ups are essential to keep doors and trims looking fresh and professionally finished. When addressing imperfections such as bumps, roller stipple, or brush marks, it is important to first ensure the surface is clean and smooth before reapplying paint. Light sanding with fine-grit sandpaper (around 220-grit) helps to remove any irregularities and provides a better surface for paint adhesion.
Before starting touch-ups, check handles, locks, and other hardware to avoid accidental paint stains or damage. Cleaning the woodwork and adjacent walls of dust ensures that painter’s tape will adhere securely, allowing for crisp, clean lines when repainting. Avoid using specialized touch-up tools that promise perfect lines but may not deliver the desired finish. Instead, properly tape off trim and walls and use an angled brush for precision.
For painting large sections such as doors, rolling about 90% of the surface and using a brush only on weak spots or areas the roller cannot reach yields the best results. Choosing paints like Benjamin Moore Advance Satin, which level out well and hide brush and roll marks, can improve the durability and appearance of your paint job.
When fixing runs or imperfections, it is important to wait until the paint is completely dry before sanding and applying touch-ups to avoid further damage. Following these steps with the right preparation and tools ensures a long-lasting, professional-looking finish that maintains the beauty of your doors and trims over time.
Benefits of Painting Doors and Trims
Painting doors and trims offers numerous aesthetic and practical advantages that can significantly enhance the overall look and feel of a home. One key benefit is the ability to transform a room’s appearance by highlighting architectural features such as windows, doorways, and moldings, thereby adding depth and visual interest to otherwise plain spaces.
Choosing whether to match or contrast the paint colors of doors and trims provides different design opportunities. Matching the colors creates a seamless, cohesive effect that promotes a sense of calm and continuity, making rooms feel larger and more unified. It also simplifies the painting process by eliminating the need for precise edge work where door and trim meet. Conversely, contrasting colors can add drama and personality, accentuating architectural details and injecting pops of color that enliven a neutral palette.
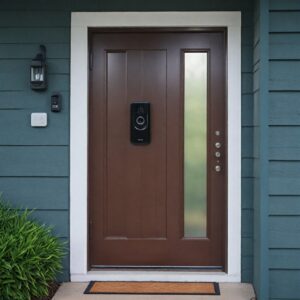
Painting these elements also plays a protective role. Painted doors and trims guard the underlying wood from damage and wear, helping to maintain their condition over time. Leaving these surfaces unpainted can result in an unfinished look and expose the wood to potential harm. Additionally, a well-executed paint job can boost a home’s curb appeal, especially when decorative trim complements an inviting front door, creating a striking first impression for visitors.
Ultimately, painting doors and trims is an opportunity for homeowners to express their personal style while enhancing both the functionality and beauty of their living spaces.
The content is provided by Sierra Knightley, Home Upgrade News